Good Morning Everyone!
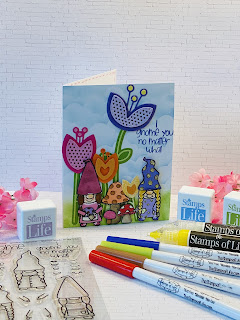
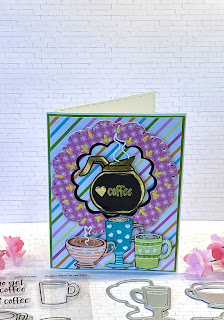
Our DT’s here at The Stamps of Life have been making some really cute cards using the June card kit that came out on June 15, 2021. Some of the DT’s will be posting videos on YouTube/Instagram and or posting cards with info of how they were made on their blogs. Be sure check them all out. I will be posting here “what I used” to make these cards. I will be posting pictures of all 5 cards I made and if you have any questions please ask. So let’s get going with the cards. Everything I used is from The Stamps of Life Card Kit which is a monthly club you are able to join. The 1st of each month TSOL comes out with a NEW Stamp and Die set which is also a club set. Go on over to the TSOL website and check them out. www.thestampsoflife.com
A2 card 4 1/4” x 5 1/2” layering piece is largest scalloped rectangle die. Frame is the next 2 below the largest.The white frame is #5 stitched rectangle.
Here is what I used to make this card:
Everything I used to make this card is in the card kit along with the except the TSOL scalloped rectangles and the stitched rectangles. I use them together to make a frame. The card stock and pattered paper comes with the kit. The border stamp on the scalloped edge rectangle is called the “quick2border”stamp set by TSOL. Use whatever paper you want and it will be super cute.
A2 size card 4 1/4” x 5 1/2”
Layers largest scalloped rectangle die- the 6th & 7th stitched rectangle dies. The patterned paper is from
the paper pad and I used the 6th stitched rectangle die for the cookie but you use
whichever paper you want
This card I called the Hooray love cookies card. I also used some of the stamps from the monthly Stamp and die club sets. The CUTE Cookie paper is in the 6x6 pattern paper that comes with the kit. I also used the scalloped border dies from TSOL and the 3’d gel pens on the edges…tip when using the gel pens make sure to let them dry for at least 6-8 hrs it keep there shape. Again I used the stitched rectangles and scalloped rectangles together. Pretty easy card.
*******
This is an A2 size card. The frames is made using the stitched rectangles dies #8 & #9 (the 2 largest dies cut together makes the frame. I cut 4 of the scalloped boarders and put it around the inside of the frame. Use the #8 die from the patterned paper “you got this” for the larger cookies. Use whatever paper u want. Then I hand cut out all the cookies and used dimensional tape to make it stand up (the hearts on the cookie paper). The ribbon is in the card kit. I used 3’d gel pens to make the dots on the scallops and I put the 3’d sparkly pen on the bow.
********
This card was pretty simple. Using another piece of the patterned paper I colored the frame using the mini ink pads. Cut out some of the cookies and hearts popped them up and then used the 3 ‘d gel pen for dimension and little dots to make the back ground pop. Again I used the scalloped edge die to outline the edge of the frame. If you don’t have the die you can use whatever you already have or outline it with a marker. I wrapped the ribbon around the back of the frame and tied a bow in the front then used the 3’d gel pen to make it shine. The sentiment is in the Cookie2stamps club set.
A2 size card 4 1/4” x 5 1/2” layering piece (bubblegum) is 3 3/4” x 5 1/2”.
1- 3 3/4” x 5 3/8” quava c/s
2= 11/16” x 5 3/8” pink hearts
1-2 1/8” x 4 5/“ white c/s
2- scalloped boarder dies (yellow c/s)
Ribbon from TSOL
Use any greeting you have to go across the top
This card I called the mixer card. This card I used the patterned paper and cardstock again in the kit. I die cut the mixer out of the patterned paper and used the cookie paper again I jus layer the papers and popped each layer up with dimensions but if you don’t want to pop it up you don’t have to. It will look cute either way. The saying is in the kit but I did use a banner die for the saying. And I framed it to the banner die then stamped it so the curve would be inside the frame. Again I used the ribbon from the kit and the 3’d gel pens. Love this card
Here are the measure or this card: This is an A2 size card and I added a piece of heart pattern paper to the top of white 4” x 5 1/4” . Then I added a piece of pattern paper 1 1/4” x 4” & glued them together Made a straight edge board and used a die for the bottom edge then added the words that came in the card kit
To decorate the top I used the circle dies and the large cookie die from the card kit Used whatever size circle you want from the circle dies


Again I used everything from the card kit but also from the Cookies2stamp set and dies As you probably have noticed about the clubs -the club set match with each other. So the Stamp and die club go with the Card Kit club. So everything you get with these club set you can use with everything I LOVE that. This card I used the “you got this” dies from this set. I also used another TSOL die to make a border that I had in my stash. But use whatever you have on hand. You could even cut a piece of patterned paper to put across it I hand cut some of the mixers from the patterned paper and add them to the striped paper and added a bow Everything was from the kit You will be able to make more than 10 cards with this kit and all you need is a die cutting machine, scissors and tape. Everything else is in the kit. Hope you enjoyed these cards. Thanks for joining me. Please leave a comment …I Love to read them.
Enjoy
Cheryl 💕
*** on the paper sizes…my cards are A2 (4 1/4” x 5 1/2”) unless otherwise noted. Layering piece for the A2 size cards are usually 4” x 5 1/4. If using a square, rectangle, & circle, die(which includes scalloped edge of any of these) I use whatever one I thinks looks good on the card Sometimes I choose the one right next to it in size and other times I make it larger but skipping one or two or even 3 You can usually tell buy looking at the photo. I usually ALWAYS use foam tape on frames or on the items for dimensions. If you have any questions …please ask me…I am always willing to tell you if you need help. 💕


